Showing posts with label Craft. Show all posts

Monday, 19 August 2013

Monthly Moodboard - Craft Colour Riot


I'm getting my craft mojo back and have managed to undertake a few projects this week.  My stag beetle embroidery went well (see previous post) and I've made a felt ball garland.  I've also started to make a ripple blanket using the tutorial from the brilliant Attic24 blog, it's an easy pattern to follow once you get the hang of it.  I'll post some more updates on here as I progress.

It's my last day before I go back to work tomorrow, the summer has whizzed by and there's a week full of sunshine forecast whilst I'm stuck in the office.  It won't be long before the hedgerows are full of ripe fruit ready to be picked and conkers start making an appearance in the playground. August through to September is such a lovely time of year.


Pin It

Wednesday, 14 August 2013

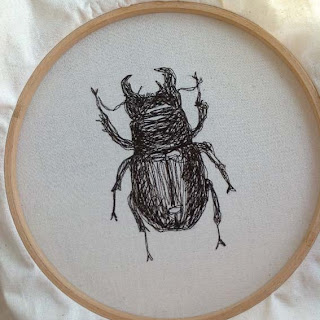
#Quick Crafty Makes 6 - Machine Embroidery - Stag Beetle

beetle machine embroidery

 
After four weeks summer holiday it's back to work for me, the summer has been great, we've been so busy and done so much.  Now that time is going to be limited I thought I'd russel up a last minute craft project.  I saw this stag beetle template in issue 28 of Mollie Makes, I thought it'd be perfect for some free motion machine embroidery.  For tips on how to do this please take a look at a previous post I've written on the subject.
 
I thought this would look good on the wall in a vintage frame or even left in the embroidery hoop,  alternatively you could use this idea as a decoration for numerous items such as a motif on a cushion or bag.  I'd like to sew some other insects and make a small collection of six legged mini beasts to adorn my walls.
 
For this one I've traced, using a pencil, on to some calico and placed the fabric into an embroidery hoop and off I went!  You can find you own motif to trace in many places such as in books, the internet or use fabrics and wallpapers as inspiration.  I also like the idea of sewing some insects in neon brights onto a grey toned fabric, i think this could look great.  Machine embroidery is so quick to do and gives immediate satisfying results and this technique is very forgiving if a mistake it made, it's ok for it to look a bit naive or rough and ready.

 
beetle machine embroidery

beetle machine embroidery


Pin It

Friday, 3 May 2013

Guest Blogger 'Create it With Samantha' - Wedding Ring Pouch Tutorial

I am lucky enough to have another great guest blogger featuring on Make, Do, Sew today, Samantha writes 'Create it With Samantha'.  This blog is an eclectic mix of craft, motherhood, home life, vintage and recipes.  It's a really good read and appeals to a wide audience with its broad range of subjects.  Samantha is also in the midst of putting together a website and also has an Etsy shop, she is one busy woman!!!  Today's guest post is a fantastic tutorial with step by step instructions/images to follow.  I hope you enjoy!


Project: Wedding Ring Pouch Designer: Samantha Schofield

This Wedding ring pouch, is a perfect customised gift for the Bride and Groom and also handy for the Best Man too!  Wedding rings are so tiny and on the big day can be easily mislaid, make this little pouch to not only to give reassurance to the Best Man but also a keepsake of the Wedding Ceremony.  I still use mine for holidays, swimming trips, DIYing; those times when it is safer to take your rings off and put them in a safe place.
Here is how you can make this project within two hours with many items from your sewing box.


You Will Need:

15cm x 12cm linen fabric
75cm x cream double faced 3mm ribbon (Cut into 3 pieces 2 x 20cm and 1 x 35cm)
1 skein of embroidery stranded cotton thread DMC 3712
1 pot of fabric paint Dylon gold
Heart stamp (this one was in a stamping kit from Boots.com)
1 cross stitch needle
1 sewing needle
1 spool of self coloured thread
Sewing scissors
Sewing pins
Use of a sewing machine
Cross Stitch Pattern ABC


Let’s Create!


1. Fold The Fabric - fold into thirds length ways and then in half.


2. Stamp Your Hearts - Test first to get your stamping technique perfected on paper! Print using equal amounts of fabric paint across your stamp, five hearts across your fabric using the picture as a guide.


3. Stitch Your Hearts & Initials - thread your needle with two strands of stranded cotton in 20cm lengths. Firstly using a backstitch, outline the printed hearts.
Then following the cross stitch pattern, add the initial of the bride and groom over the hearts which will form the inside of the pouch.
If you are new to cross stitch this link on technique can help. Link to http://www.cross-stitching.com/how-to from a click through from ‘help’


4. Detail of cross stitch and backstitching


5. Add The Ribbons - pin the longest ribbon to the centre back and hand stitch on. With the two smaller ribbons, tie in a knot in the middle. Handstitch the ribbons in the bare centre square so they are in line with the initial hearts. This is where the rings will be secured.


6. Sew The Pouch Together - with the right sides together and the ribbons tucked in, pin and sew on the sewing machine the pouch together down one short side and the longest side. Grade the seams and cut the corner bulk off. Then turn inside out to show correct side. Press. Handstitch up the open side to form a seam. If the fabric frays, it maybe easier to zigzag the raw edge to make easier handling. 


7. Press The Ribbons & Seams - with the end of iron on a low heat press.


Your Finished Wedding Ring Pouch!


For more inspiration visit my website www.samanthaschofield.co.uk or my blog http://createitsamantha.blogspot.co.uk to rediscover vintage and ladylike crafts!


Pin It

Friday, 29 March 2013

Guest Posting - Handmade Easter Egg and Hen Tutorial

I made this Easter decoration over the weekend and today it's being featured on Cassie Jene's blog in the form of a tutorial. If you want to see how to make it click on the link. It looks great even if I do say so myself!  Cassie writes an inspirational blog offering tips and advice for keeping the 'work life balance' in order as well as being a creative entrepreneur and hobbyist.  Take a look at her blog, you won't regret it.


Pin It

Sunday, 24 February 2013

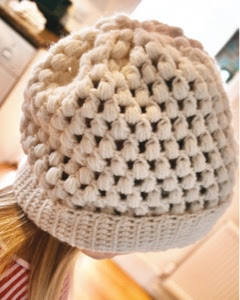
Crochet Slouchy Hat - Puff Stitch Tutorial

During the cold weather we've been having lately I realised I didn't own a winter hat, after some searching on the Internet I found a pattern I liked on Ravelry. I've never followed a crochet pattern until recently, normally I stick to simple blankets or make up my own jumbled designs. I found this pattern so easy to follow and was really happy with the results.


Puff Stitch Crochet Hat

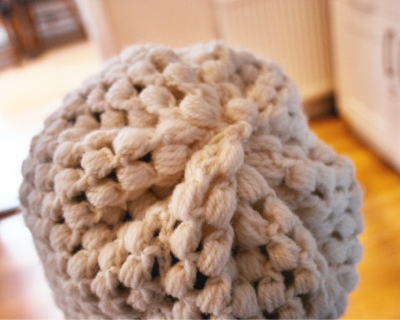
I used a Aran yarn and a 7mm hook. I thought I'd include a quick video tutorial of how to do the puff stitch as it looks effective and is very easy to do. I'm now going to make a scarf and am going to go back to my old ways of making it up as I go along. You can't go wrong with a long rectangle surely. Needless to say I'll post my results here.


Puff Stitch Crochet Hat


Pin It

Friday, 4 January 2013

#Quick Crafty Makes 4 - Random Softie Rabbit

I love the ugly dolls and softies I have seen on the internet, they look effective and the random nature of their bodies and facial features adds to their character. I had a spare hour and the urge to use my sewing machine so decided to make my own.

This has got to be the cheapest, quickest and easiest make I've ever done. A couple of pieces of scrap calico, a quick wizz on the sewing machine, some stuffing and simple embroidery stitches to add features and voila, my rabbit is complete. The more random the shape the better.

This took less than an hour and my children are already arguing over him, so much so, that I now have to make another!


Pin It

Sunday, 16 December 2012

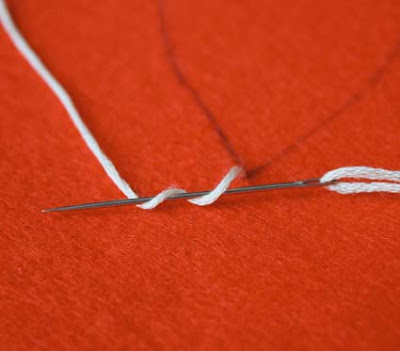
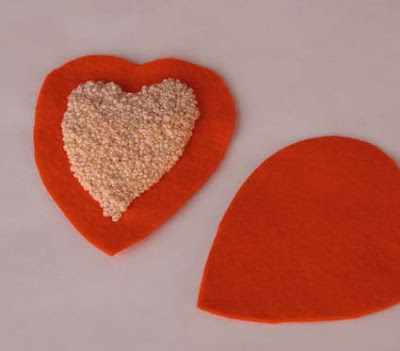
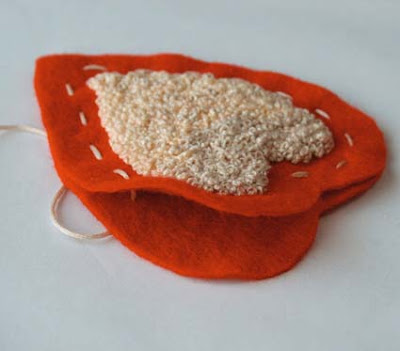
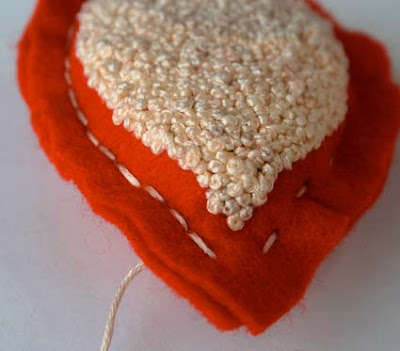
How to Make a Festive French Knot Heart - see my tutorial on www.craftcandy.co.uk

French Knot Heart
  
I came across Craft Candy whilst on Twitter, its a relatively new venture supporting London based craft related organisations.  Their website lists craft events, activities and businesses and promotes these through the use of social media and technology, they are even launching a Craft Candy app!

They are looking for guest bloggers and I put my name forward for consideration.  I had a few craft activities on the go and my French knot heart was selected for their blog.  For the full tutorial go to www.craftcandy.co.uk.

French Knot Heart

French Knot Heart

 French Knot Heart


French Knot Heart

French Knot Heart

French Knot Heart

French Knot Heart

French Knot Heart

French Knot Heart

French Knot Heart

French Knot Heart

French Knot Heart

French Knot Heart

Pin It

Friday, 30 November 2012

Marbling - satisfaction guaranteed

Marbling, it's such an old school technique that most of us would have had a go at in primary school. The random and unique nature of each piece adds to the satisfaction, some of the outcomes remind me of ordinance survey maps.


Pin It

Sunday, 28 October 2012

#Quick Crafty Makes 1 - Typography


Quick crafty makes...what's that all about?  Well, I will be posting speedy makes that take under 2 hours to create and achieve a respectable, if not wonderful outcome.  This idea came about due to my lack of time, I'm a working mum who tends to be rushing around most of the time.  I'm sure this sounds familiar to most parents who work and have a family.


Luckily I work part time but I still have to manage the house, school runs, nursery etc etc, don't get me wrong I'm not complaining I'm just busy!  The only time I get to apply myself totally is when my baby has his nap time which last about 2 hours, I can whip out my scissors, pins, sewing machine etc and get stuck in. (See my previous post for more on this).


The technique used is free-motion machine embroidery, this is where you essentially draw using the thread on your sewing machine.  It's a really easy technique you just need to have your machine set up properly.  Click on the link below for a great website with more info on this.


You will need:


A sewing machine capable of free motion sewing
An embroidery hoop
A selection of different colour threads
A sturdy fabric (light weight fabrics such as chiffon might be problematic)
A pencil for marking out your design


If possible get all your equipment ready in advance so you can optimise the time available for actually sewing.


1. On your computer select a letter and font, print this out to the size you require, the bigger the letter the longer it may take.

2. There are two approaches to step 2 I've tried both.
a. Pin your print out to your chosen fabric then place both in the embroidery hoop.
b. Using a pencil lightly trace your font on to your fabric, this is less bulky and in my opinion gives a better result.


3. Ensure your fabric is nice and taught in the embroidery hoop, when tapped the fabric should sound like a dull drum.

4. You can now begin to free-motion sew your design on to the fabric.  Don't worry too much about your sewing being ultra neat, this technique is supposed to be a bit haphazard.  It's up to you how much density your design has, the more you sew the denser the design will be.


NB: if you are sewing over a paper template you will need remove the paper at this point, try to remove as much as you can.  I know some people like to leave parts of the paper on their design to add texture.  If you like the way this looks go for it.


free motion embroidery typography


5. Once you are happy with your outline you can now add some colour or maybe not, it's up to you.


free motion embroidery typography


6. Finally, press and trim off any loose threads (if you want leave some threads there to add further interest to your design then do).
And...voila you are done!


free motion embroidery typography


I love this technique, I did have some problems initially with tension and my needle broke a few times but I did manage to do a whole letter in under 2 hours.


If you decide to give this a go I'd love to hear how you get on.


Lou x
Pin It
Related Posts Plugin for WordPress, Blogger...